
Monday, June 13, 2016
Photoshop Tutorial
1. Removing Blemishes: Watch 2:10 - 6:29
Use Spot Healing Brush
2. Filters: 6:29 - 9:03
3. Layers and Mini Bridge: 9:14 - 14:30
Using Selective Adjustments
4. Removing (and moving)objects from a photo: 14:30 - 19:35
Patch tool
5. Quick selection - putting a subject on a different background: 19:40 - 29:12
Two photos
6. Another example of #5. 29:15 - 35:30
7. Type tool: 35:38 - end
Thursday, June 2, 2016
Finishing your composition assignment and what's next
Your submitted final composition photos should look like this:
Inside the BEST PHOTOS folder - found in 1059 - YEARBOOK - TIJ1O1 - PHOTOS - BEST PHOTOS
you should create a folder with YOUR NAME on it that says MyNameBestPhotos.
Inside your Best photos folder create two folders:
MyNameFinalJPG and MyNameFinalPSD
Use Adobe Bridge to RATE your work using the star system (Command or apple and a number to rate them, or click on the dots beneath the photo you select)
Once rated, your can MOVE all the favourite photos into your Best Photos folder while still in Adobe Bridge by clicking FILE - MOVE TO - and find your MyNameBestPhotos folder.
From that folder, you can begin your editing process in Photoshop and find 1 great photo to represent each of the 6 required composition photos to submit.
When you have finished editing save the photo using the file name that matches the composition technique AND add your name to the file name AND original file extension (DSC_####) like the example below:
MyNameRuleofThirds_DSC0080.psd
Your first save should save the photos as a PSD file and this should be saved into your MyNameFinalPSD folder.
Save the exact same photo again, but this time change the FORMAT to JPEG by clicking on the format tab. Save it to the MAXIMUM quality with the same file name. It will automatically change the file extension (the three letters after the dot in the file name) if you change the format in the format tab to JPEG.
Save this one to your MyNameFinalJPG folder. It should look like this:
MyNameRuleofThirds_DSC0080.jpg
You should end up with your 6 final photos as .jpg files in the jpg folder and the exact same photos as .psd files in your psd folder.
The difference is, if you wanted to continue editing your .psd file, you can because it saved with all of the layers you used in your editing process.
WHAT'S NEXT???
Your next assignment will require you to try one cool photoshop tutorial and use it on one of your photos that you took for the composition assignment.
You can choose from one of these links below:
Photoshop Essentials
30 amazing Photoshop tutorials
50 more Photoshop effects
OR find something else that interests you.
Submit ONE final photo that you are able to complete by the end of class on Friday.
Evaluation is based on creativity and effort that demonstrates an obvious change and improvement (to make it look more interesting) from the original image
Inside the BEST PHOTOS folder - found in 1059 - YEARBOOK - TIJ1O1 - PHOTOS - BEST PHOTOS
you should create a folder with YOUR NAME on it that says MyNameBestPhotos.
Inside your Best photos folder create two folders:
MyNameFinalJPG and MyNameFinalPSD
Use Adobe Bridge to RATE your work using the star system (Command or apple and a number to rate them, or click on the dots beneath the photo you select)
Once rated, your can MOVE all the favourite photos into your Best Photos folder while still in Adobe Bridge by clicking FILE - MOVE TO - and find your MyNameBestPhotos folder.
From that folder, you can begin your editing process in Photoshop and find 1 great photo to represent each of the 6 required composition photos to submit.
When you have finished editing save the photo using the file name that matches the composition technique AND add your name to the file name AND original file extension (DSC_####) like the example below:
MyNameRuleofThirds_DSC0080.psd
Your first save should save the photos as a PSD file and this should be saved into your MyNameFinalPSD folder.
Save the exact same photo again, but this time change the FORMAT to JPEG by clicking on the format tab. Save it to the MAXIMUM quality with the same file name. It will automatically change the file extension (the three letters after the dot in the file name) if you change the format in the format tab to JPEG.
Save this one to your MyNameFinalJPG folder. It should look like this:
MyNameRuleofThirds_DSC0080.jpg
You should end up with your 6 final photos as .jpg files in the jpg folder and the exact same photos as .psd files in your psd folder.
The difference is, if you wanted to continue editing your .psd file, you can because it saved with all of the layers you used in your editing process.
EVALUATION:
Accurate visual expression of composition
techniques
(Does your photo accurately
represent the composition techniques in question?)
Dynamic and interesting photos (well composed, clear subject, photographer
clearly “worked the scene” to choose BEST photo)
(Does the composition
make you want to keep looking at the photo? Is it compelling and interesting to
look at?)
Exposure and Editing (not too bright, not too dark)
(Use of levels and
adjustments in Photoshop improved the photo, adding contrast, colour etc. without
overdoing it)
Submission accuracy (file names and folders)
(Clearly labeled in
proper folders according to examples shown)
WHAT'S NEXT???
Your next assignment will require you to try one cool photoshop tutorial and use it on one of your photos that you took for the composition assignment.
You can choose from one of these links below:
Photoshop Essentials
30 amazing Photoshop tutorials
50 more Photoshop effects
OR find something else that interests you.
Submit ONE final photo that you are able to complete by the end of class on Friday.
Evaluation is based on creativity and effort that demonstrates an obvious change and improvement (to make it look more interesting) from the original image
Thursday, May 12, 2016
The Last Roll of Kodachrome
After viewing this short film, answer the following questions in a word document.
1. What do you think is the main difference between digital photography and film?
2. Why do you think the last roll of Kodachrome is so significant?
3. Steve mentions three challenges in taking photos: Exposure, Expression and Sharpness. Explain what you think he means by any of these three challenges.
4. What is one thing you learned from watching this film?
Tuesday, May 10, 2016
Composition in Photography - TIJ 1O1
1. Watch the first 30 minutes (31:18 to be precise) with the class.
2. Take the handout and begin the assignment.
3. SAVE YOUR WORK in YOUR HOME DRIVE!
2. Take the handout and begin the assignment.
3. SAVE YOUR WORK in YOUR HOME DRIVE!
Tuesday, March 1, 2016
Thursday, February 18, 2016
Logo Design - TIJ 1O1
Here are a few links that will help you.
On my PINTEREST page, you'll find examples of thumbnail sketches, a few logos, colour psychology and mind maps.
THIS SITE also demonstrates the early stages of logo design for a personal logo and the steps the person took using a mind map and then sketches (though they posted the sketches first and then the mind map - they created the mind map first!)
Thursday, February 11, 2016
Logo Design Tutorial
Click HERE to begin the logo design tutorial. Follow the steps and try to recreate this logo.
SAVE it on your DESKTOP when you have finished, or when you are finished for the day, as yourname_logotutorial.psd
Make sure you choose Desktop to save it and make sure you choose the same computer the next time.
SAVE it on your DESKTOP when you have finished, or when you are finished for the day, as yourname_logotutorial.psd
Make sure you choose Desktop to save it and make sure you choose the same computer the next time.
Tuesday, February 9, 2016
Logo Design - TIJ 1O1
http://www.webdesignerdepot.com/2009/06/12-essential-rules-to-follow-when-designing-a-logo/
http://menwithpens.ca/logo-design-elements/

Logo Design basics from Greg Sarles

http://menwithpens.ca/logo-design-elements/
Logo Design basics from Greg Sarles

Logo Tutorial Here:
https://www.udemy.com/the-logo-design-process-from-start-to-finish/?tc=blog.photoshoplogotutorial.cta.p&couponCode=blog15&utm_source=blog&utm_medium=udemyads&utm_content=post19198&utm_campaign=content-marketing-blog&xref=blog
Tuesday, January 19, 2016
Culminating Activity Part 2 _ Design an amazing magazine cover in Photoshop
Objective: Design a dynamic magazine cover that "sells" the magazine (theme and title of your choice), adhering to the principles of design (4 main principles below), and using original photography (must have a portrait on the cover).
Requirements:
1. Must be 8.5x11" @ 300 p.p.i in Photoshop
2. Must include some type of background (you can create a graphic or add a photo)
3. Must include an original photo of a person as the main visual (could be you or a friend taken on the green screen to add to a different background)
4. Include the 4 principles of good design
5. Include 5 fictional article captions, or headlines
6. Use multiple layers and at least one mask
7. Include a main headline (title of magazine)
You can use the green screen with a self-portrait, or photograph someone in the class to complete this assignment.
You may use an existing magazine title, or come up with an original title, however you must use an original layout and design.
Requirements:
1. Must be 8.5x11" @ 300 p.p.i in Photoshop
2. Must include some type of background (you can create a graphic or add a photo)
3. Must include an original photo of a person as the main visual (could be you or a friend taken on the green screen to add to a different background)
4. Include the 4 principles of good design
5. Include 5 fictional article captions, or headlines
6. Use multiple layers and at least one mask
7. Include a main headline (title of magazine)
Procedure:
1. Research (Wednesday Jan. 20 - give yourself half the class to finish this. Plan to be done by 9:30)
a. Understanding good magazine design.
a. Understanding good magazine design.
Go to this LINK to review these 4 principles of good design.
Proximity
Contrast
Alignment
Repetition
b. Start a word document and summarize each of these four principles in your own words.
Heading: Principles of Good Design
Heading: Principles of Good Design
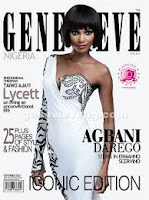
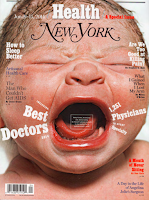
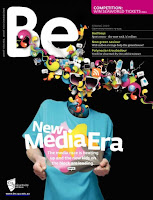
c. Take a look through some of these magazine covers and answer the following questions in the same word document.
Heading: Magazine Cover Design.
1. What do each of the three magazine covers you chose have in common? Think about the use of visuals and text and the visual hierarchy (order of importance).
2. Which magazine cover does the best job of creating/adhering to the principle of contrast? Proximity? Alignment? Repetition?
3. Which magazine cover does the best job of staying connected to the theme of the magazine and content? What design devices are used to convey the theme? (think visual images, layout, typography, colour)
Click HERE for some great magazine covers to view.
Choose three magazine covers that are successful at adhering to the 4 extremely important design principles.
Copy and paste the 3 you chose into your word document so that they are presented across the page, like this:
2. Brainstorm ideas (Wednesday Jan. 20 - 9:30 - 10:05)
Internet, magazines on bookshelf
Create a sketch of your idea that includes the theme, title, and how you will photograph the person/yourself
Include your fictional article ideas so you don't have to think later.
3. Take your photos (Thursday Jan. 21)
Use the green screen and lights in room 141 to take your photos. Ms. Silverman can help with this
4. Edit in Photoshop (Thursday Jan. 21 and Friday Jan. 22)
Create your photoshop document and start building your magazine cover.
Drop into Culminating folder marked Magazine Cover
5. Artist Statement (2-3 paragraphs in a word doc)
Write a brief statement discussing how you used proximity, contrast, alignment and repetition in your magazine cover. Then discuss how your choice of typography, colour and image helped to express the theme of your magazine.
Copy and paste the 3 you chose into your word document so that they are presented across the page, like this:


2. Brainstorm ideas (Wednesday Jan. 20 - 9:30 - 10:05)
Internet, magazines on bookshelf
Create a sketch of your idea that includes the theme, title, and how you will photograph the person/yourself
Include your fictional article ideas so you don't have to think later.
3. Take your photos (Thursday Jan. 21)
Use the green screen and lights in room 141 to take your photos. Ms. Silverman can help with this
4. Edit in Photoshop (Thursday Jan. 21 and Friday Jan. 22)
Create your photoshop document and start building your magazine cover.
Drop into Culminating folder marked Magazine Cover
5. Artist Statement (2-3 paragraphs in a word doc)
Write a brief statement discussing how you used proximity, contrast, alignment and repetition in your magazine cover. Then discuss how your choice of typography, colour and image helped to express the theme of your magazine.
Evaluation:
Proximity is used to organize, create structure and connect related elements
Contrast used to attract attention, good amount of difference between elements creates a dynamic cover design
Repetition is used to create unity by adding common elements (fonts for common elements are similar, other elements are repeated to create harmony), and for visual interest
Alignment is used to help the eye follow content and create a connection with the material and helps organize material
Overall design adheres to a theme
Photograph is well taken, well edited and "pops" off the cover.
Background helps create contrast
Simplicity (not too busy) allows for the eye to move around the page easily without overwhelming the reader
Product looks finished and professional
Culminating Mark Breakdown
Star Wars DVD + Disc = 14%
Magazine Cover = 9%
Written research = 3%
Written artist statement = 4%
Friday, January 8, 2016
Random Album Cover Exercise
This exercise forces you to get creative with a random band name, album title and image. You must decide, based on the name of the band you are given, what the style of music and personality of the band is. Then, based on your decision, create the album cover by choosing an appropriate typestyle and layout. The only things you can use are the image you are given, the name you are given and the title. Have fun! When you are finished, write a brief paragraph justifying your choices.
Instructions:
1. Go to "wikipedia." Hit “random”or click http://en.wikipedia.org/wiki/Special:Random
The first random wikipedia article you get is the name of your band.2. Go to "Random quotations"or click http://www.quotationspage.com/random.php3
The last four or five words of the very last quote of the page is the title of your first album.
3 . Go to flickr and click on “explore the last seven days”or click http://www.flickr.com/explore/interesting/7days
Third picture, no matter what it is, will be your album cover.
4. Use Photoshop or Illustrator to put it all together.
5. Repeat this activity twice if you want and make two completely different album covers. (only if you have extra time)
6. Write a paragraph in word justifying your design choices.
Click here to see examples of Random Album Covers with a written description.
Tuesday, January 5, 2016
Elements and Principles of Design
The Elements of Art & Principles of Design from jdavis76
Slide show below goes into a little bit more depth about the elements and principles of design.
Slide show below goes into a little bit more depth about the elements and principles of design.
Elements and Principles of Design from Nishu Tomar
The Elements and Principles of Design are the foundations of design, whether it be in the print industry, photography, illustration, advertising, animation, video and film, web, fine arts, graphic design etc.
Once you know and understand these basics, you will gain the ability to control where your viewer looks, and when, or in what order! And then, the WORLD!!! Or at the very least - unbelievably cool looking posters, logos and other designs...
Once you have seen the slide show in class, fill out the handouts either by hand - or on the computer (whichever you prefer). You can find the blank templates in the Yearbook-15-16-Comm Tech folder.
Elements of Design Handouts
Due: Thursday Jan. 7th
This should be done BEFORE you complete the Random Album Cover Exercise
Monday, January 4, 2016
More Photoshop - Breaking it down...
PSD Tuts Plus - Click HERE
Go to the Tutorial How to Use Layers
Text Clipping Mask tutorial FIRST VIEW THIS AND TRY IT. Use the clipping mask by adding text and images together. Play around with blending modes AND label all your layers.
Text portrait tutorial. THEN Watch this video and try it out!
Photoshop Double Exposure - long video
Double Exposure - quick and dirty
We will be viewing a few of these tutorials this week and doing mini assignments every day.
https://edex.adobe.com/resource/c5c21d9a39
Subscribe to:
Posts (Atom)